
My three year old made this little rug on a hula hoop!


 Sculpture by my two year old.
 Original photo that I can't figure out how to turn.
 Drawing with the starting of watercolor for the eyes and mouth.
 Textured background, skin color and pjs.
 More details.
 First shadow. So scary to paint with black over the majority of your painting!!!
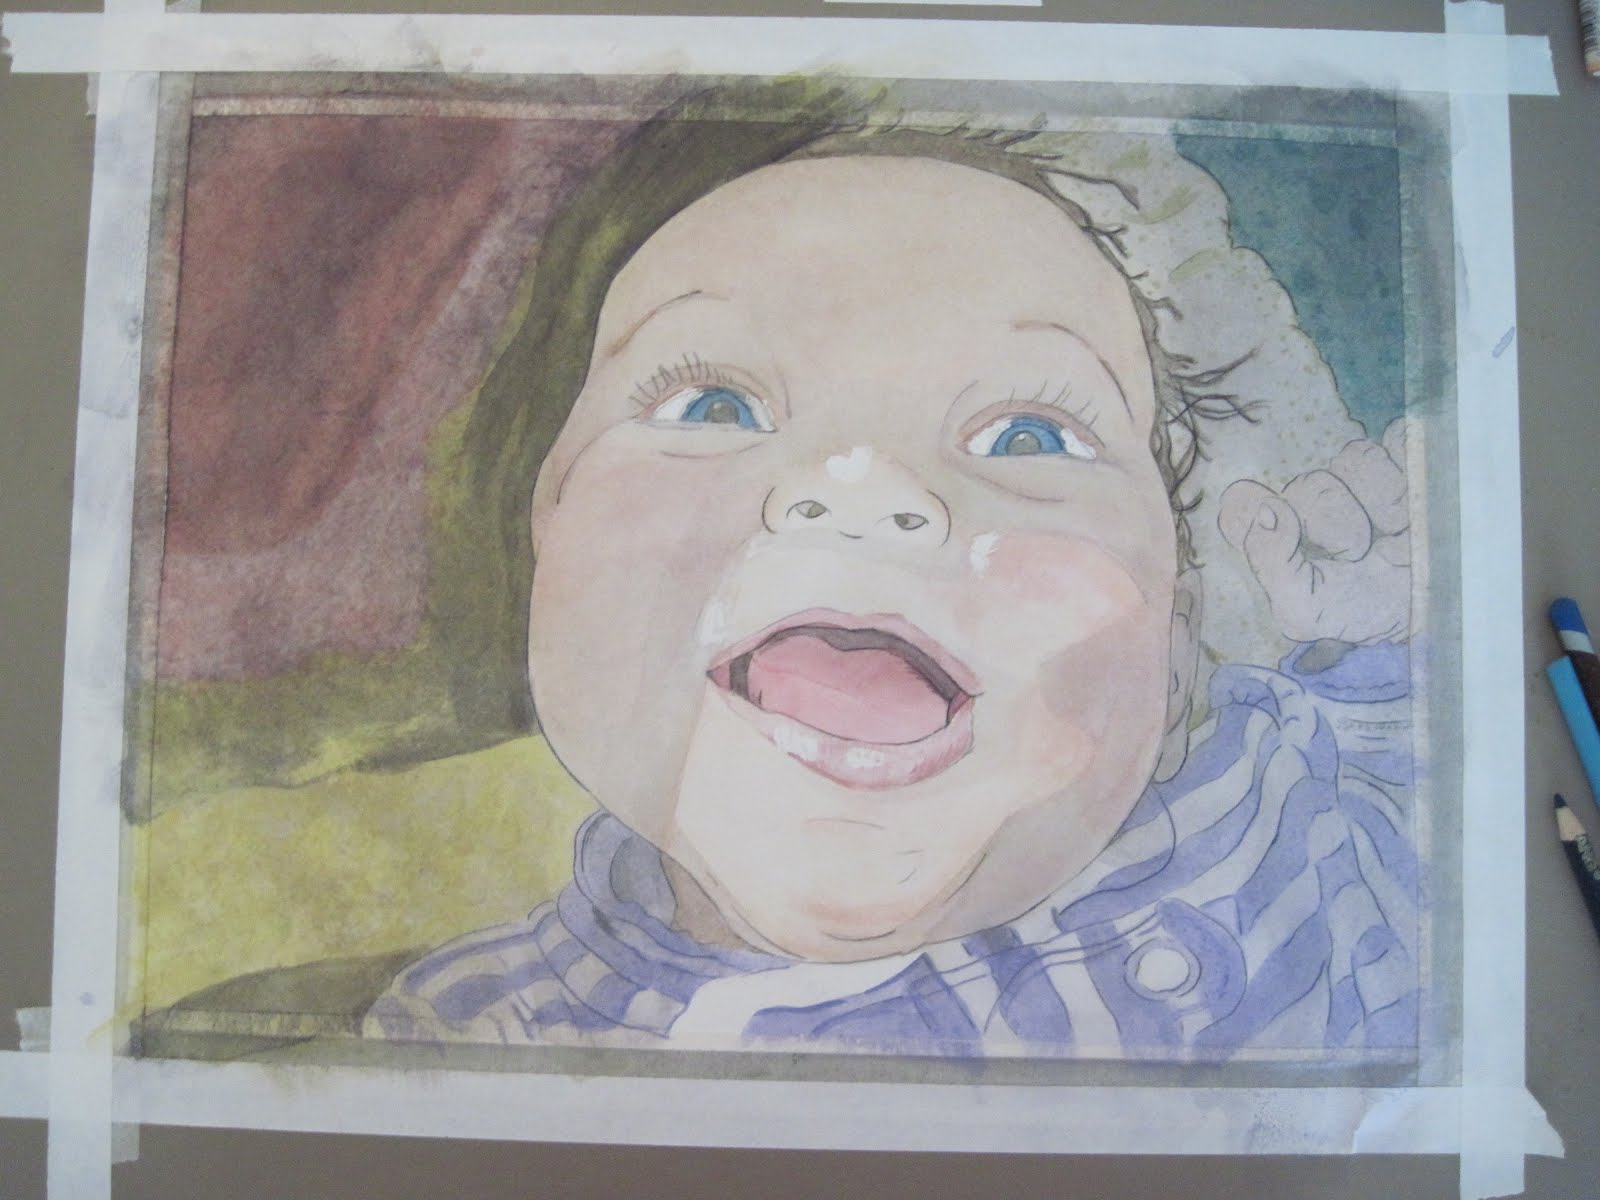 More shadows over hand and background. Remove resist on eyes, nose, lips, and cheeks.
 Darkening background.
 Completed.
 Makes any simple drawing look 'artsy.' Saw HERE.
Supplies:
sandpaper
crayons
thick paper (different colors of cardstock cards work well)
iron
old rags or newspaper
Instructions:
Color on sandpaper with crayons.
Iron drawing onto thick paper.
Tips:
* This makes any artwork 'artsy.'
* Fine sandpaper makes crayons melt more together. Courser sandpaper makes it look like dots of wax.
* These make cute invites to your Art Show for your neighbors and other guests.
* Iron can be on low setting. Wax melts around 150 degrees. The cotton setting is too hot and your paper/wax will start to smoke and smell.
* Put newspaper under the paper you are ironing onto or have old rags handy to clean any messes up. The mess should be minimal.

Supplies:
Type #6 Plastic (clear containers from grocery stores or carry out)
Permanent Markers
Oven
Foil
Cookie sheet
Instructions:
Cut your piece of plastic.
Draw, write or trace then color the image you want.
Heat oven to 350 degrees.
Put plastic on foil covered cookie sheet.
Put in oven for 2 to 4 minutes.
Tips:
* Put foil shiny side up!
* A 6 inch piece takes 3 ½ minutes.
* It will curl up the first 90 seconds, don't worry.


Supplies:
griddle
foil
crayons
wooden skewers or old kitchen utensil
paper
Instructions:
Cover griddle in foil and heat to 200-250 degrees.
Unwrap crayons
Put crayons on griddle and allow to melt. You can push them with the skewer.
Lay paper on melted crayons
Push paper down with skewer then lift edge of paper then lift with fingers
Layout to let cool
Tips:
*Smaller sheets of paper work the best (1/4th of sheet of paper or smaller)
*Thicker paper is necessary because of the weight of the wax. (Copier paper won't work.)
* Turned the temperature up on the griddle is fun but it will start to smoke and smell.
* Eventually everything turns brown/black but it takes a lot of crayons and mixing for this to happen.
* This method is better than laying the paper and drawing on it. It is easy/faster to take turns and the images look more 'artsy.'
* Wax cools quickly and scraps up easily.
* My two year old did not burn herself on the griddle. I simply went over the rules and stood by her. After a few examples, she could do it all herself even put on and lift off the paper.

 I saw THIS picture and made a kid's version. (Sorry about the poor photo.)
Supplies:
Wire
Tissue Paper
Brushes
Water
Glue
Small containers
Plastic bags
Instructions:
Cut several lengths of wire for each child. Give each child a brush and a small container of white glue watered down.
Have kids bend wire into ovals and twist. (You could try more complex shapes too)
Rip small pieces of tissue paper
Wrap tissue paper around the wire ovals
Brush with glue/water mixture on both sides
Allow to dry on a plastic bag overnight.
Bend wires to attach together to make a sculpture. Consider how you care going to display. If you are going to hang it on a hook on the wall or from the ceiling, where/how does the sculpture attach to the hook?
Tips:
* Artist to relate to Alexander Calder
* If the wire is too easy to bend, it makes it difficult for the child to control the sculptures.
* Wire hangers are too thick and difficult to bend to make this project look nice.
* The plastic bag easily peel way from the dried tissue paper. (Other materials do not.)
* Challenge the students. Could you make it look like a peacock? Could you make it look like rain? Could you make it look like a dragonfly?
 HERE is the simple version.
Supplies:
old books
markers
other materials: magazines, glue, scissors
Instructions:
Find messages in the words written on the page to make a new story or sentence
Add other details or create patterns with markers
Tips:
*Children who can't read could color in drawings in the book
*You could also draw an image over the writing
 I saw this idea HERE.
Supplies:
watercolor in a tube
watercolor paper
spray bottle of water (I found small perfume sprayers work the best)
cardboard or picnic table or surface to tape paper to and slant
tape (Dollar Tree masking tape works)
Instructions:
tape paper to slanted surface
put several lines (or circles or squiggles) of color from the tubes of watercolor
spray with water, gently
watch paint run
let it dry completely before removing
Tips:
* Do not put this vertical. The color will not have enough time to absorb.
* The lines of watercolor do not need to be thick
* I like the look of it being taped around all the edges

Supplies:
thick paper, cardstock will work
tempera paints
Instructions:
Put drops of paint on paper
Fold in half and rub
Open up
Tips:
* This is a great lesson to do before you have students title their artwork and do critique.
* Titling a work of art: What you title a work of art can change how people see your work. Look at the art work above. What if I title it 'fox'? What do you think? What if I title it bat? The monster under my bed? Or what if I flip the painting over and call it rhinoceros or chicken dinner? I am changing what you see just by the words I use.
* Discussing your artwork: It is intimidating talking about your artwork. You are showing people a piece of you. You are showing how much you practice and the ideas you have. This is a great piece to practice talking about because you can't determine the outcome of the artwork when you begin. There is little skill in the work. Why did you pick this one to show us? (assuming they have made several) Why did you use these colors? What is your favorite thing about this artwork? If you were going to make this work again, how would you do it differently?

Supplies:
Colored shirt or fabric
Bleach pen
Paper or newsprint
Cookie cutters (optional)
Tray to hold bleach for cookie cutters (optional)
Instructions:
Lay shirt out flat with paper inside
Draw on with bleach pen and stamp with cookie cutters dipped in bleach
Let dry
Rinse in water before washing
Tips:
* Be careful. Little children get this everywhere on themselves.
* Try not to get the bleach on too thick because it takes a long time to dry in clumps
* It is best to soak each shirt in water first before sending them home to be washed
* Words don't work well because the bleach spreads quickly


Supplies:
watercolors
water
watercolor paper
brushes
skewers
spray bottles
salt
small toys
saran wrap
small sticks, leaves and flowers
rubber cement
cheap masking tape (Dollar Tree)
Instructions:
Sticks and Saran wrap: Go on a walk to collect ideas of what to draw. Sketch the neighbor's dog, a tree, a house or the pattern on the railing up to a house. While you are walking collect small sticks, leaves and flowers. Tape watercolor paper down on all sides. Wet the entire paper with water. Paint. Lay items on the paper. Cover with saran wrap. Let dry overnight.
Small Toys and Spray Bottle: Tape paper down. Put toys on paper. Mix paint with small amount of water (or use liquid watercolors). Spray paper. Lift off toys to see silhouette.
Salt: Paint paper with watercolors. Put salt on. Let dry. (Result are little stars.)
Skewers: Paint paper. Let dry. Use a skewer to draw lines over with black paint (watercolor, tempera, ink, or acrylic).
Rubber Cement: Put rubber cement down on paper. This is fun to tape the paper to the window first with an image underneath. Then put the rubber cement where the black lines would be. Let rubber cement dry (a few seconds). Tape paper down. Watercolor. Let dry. Rub the cement off. (Result the rubber cement resisted the paint. It is white where the cement was.)
Tips: l
* Rip paper into fourths so kids can experiment
* Any watercolor is 'saved' by putting saran wrap over it and letting it dry... if it STILL needs help let the child add details with colored pencil.
*Tape paper down on all sides so it doesn't curl or run away from you
* Artist tape is nice but expensive. Cheap Dollar Tree masking tape works well and won't rip the paper if you pull up gently when the paper is dry.
*Small children need their paints sprayed so they are wet enough.
*Small children use too much water. Older children don't use enough water.
 Look at her shear joy in doing this project. She ASKED me to wrap both her hands then she giggled and crawled around pretending to be a dog.

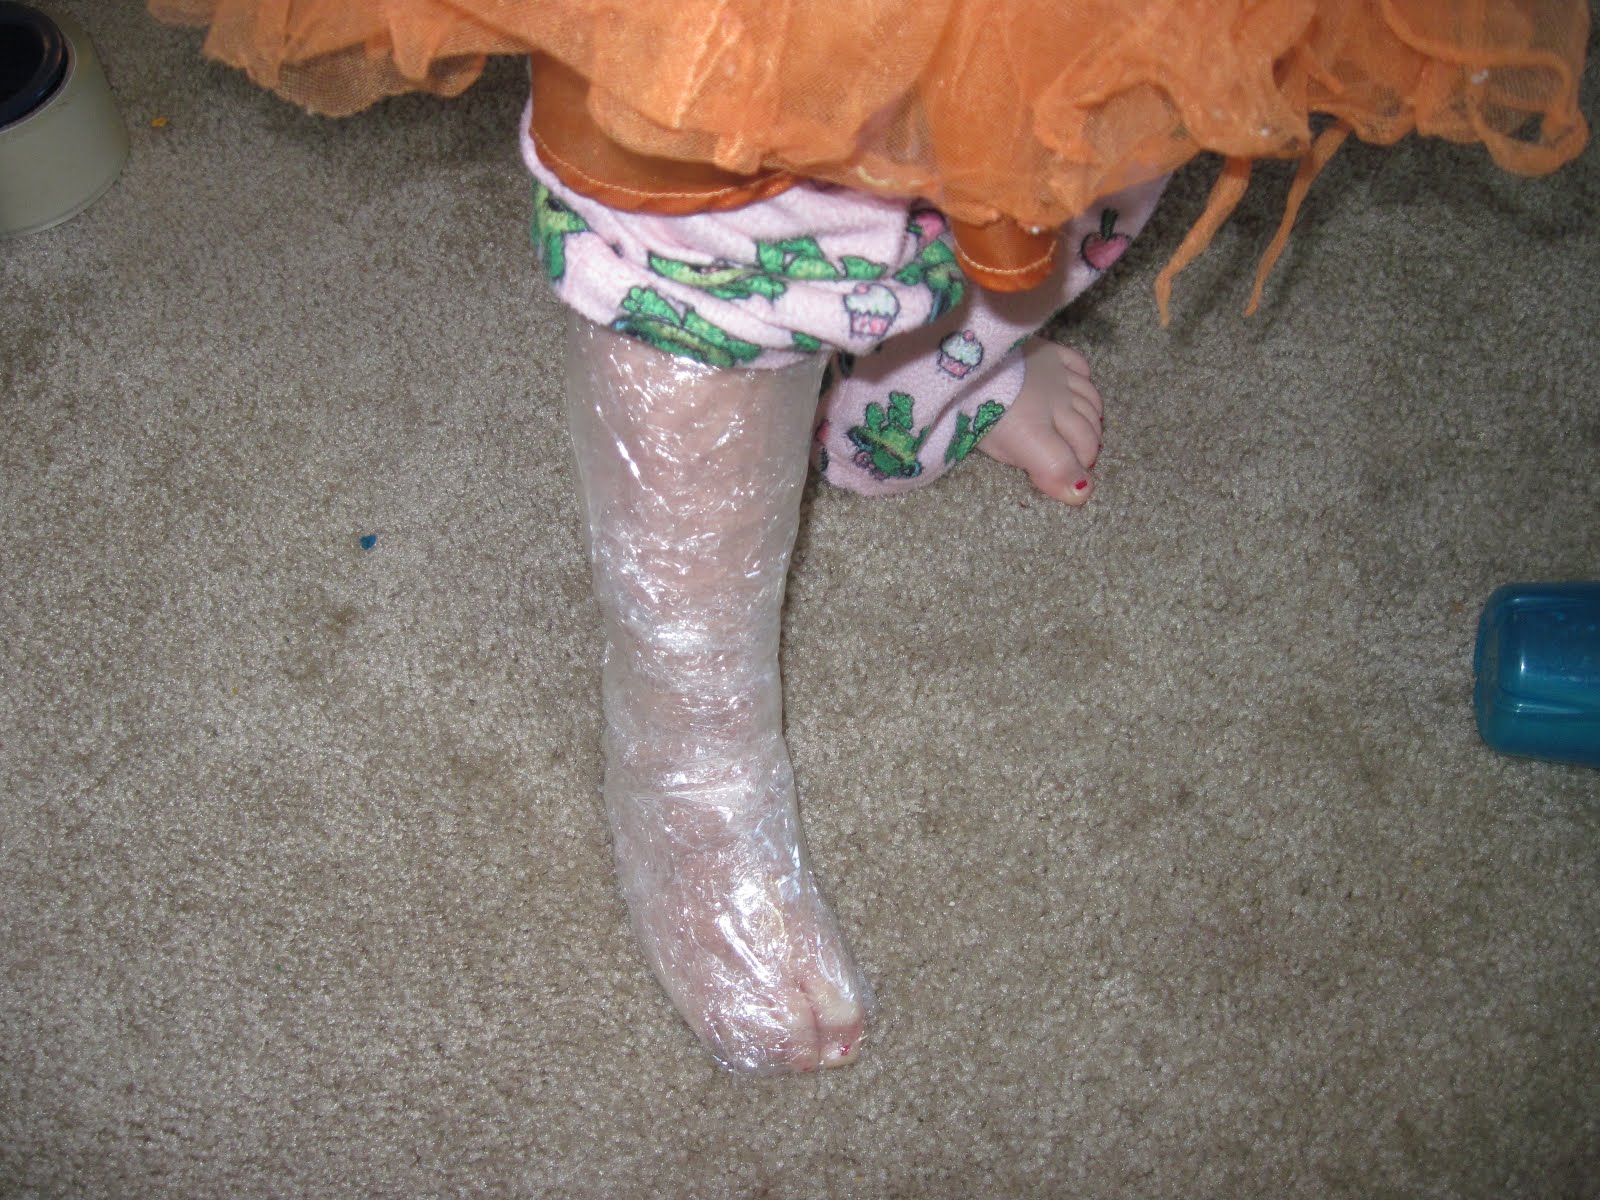
 Her hands holding the saran/tape ball.
HERE and HERE are some examples of this project.
Supplies:
packing tape
saran wrap
scissors
object or person to wrap
Instructions:
Wrap object or person with saran wrap
Cover with packing tape
Carefully cut off
Tape back together
Tips:
*You could add colored or printed images below the tape.
* Use small sewing scissors to cut sculpture off of a person
* Don't use a favorite item that could be damaged by the scissors while cutting the tape off
* This is fun to wrap around a person or a favorite toy
* To make this lesson more challenging have them try to turn the item into something else. Example: tape sculpture a teapot but then add chopstick legs and a feather to make it a circus elephant. This lesson can be related to Surrealism but is for older students.


